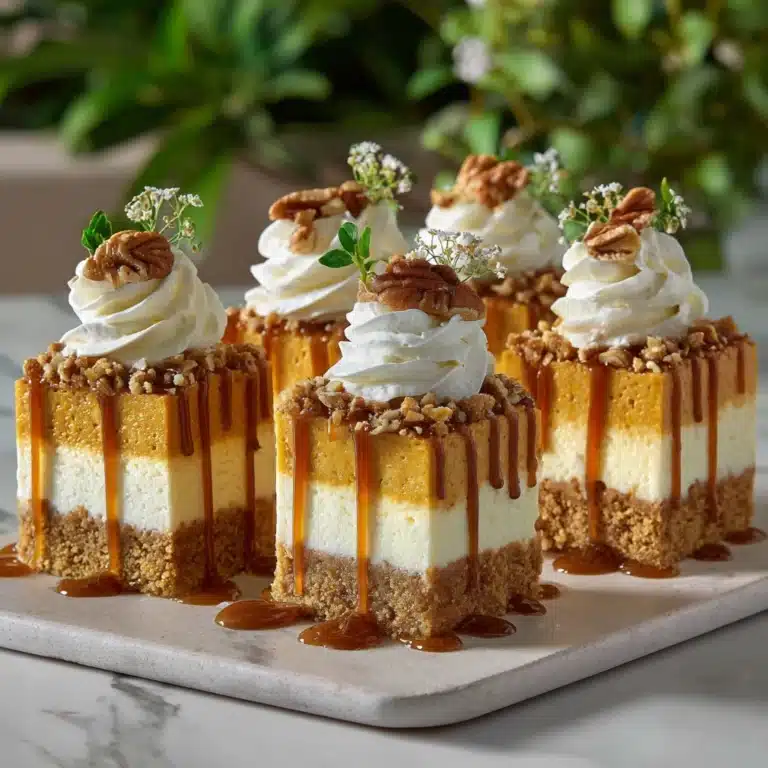
Crème Brûlée Cheesecake Recipe
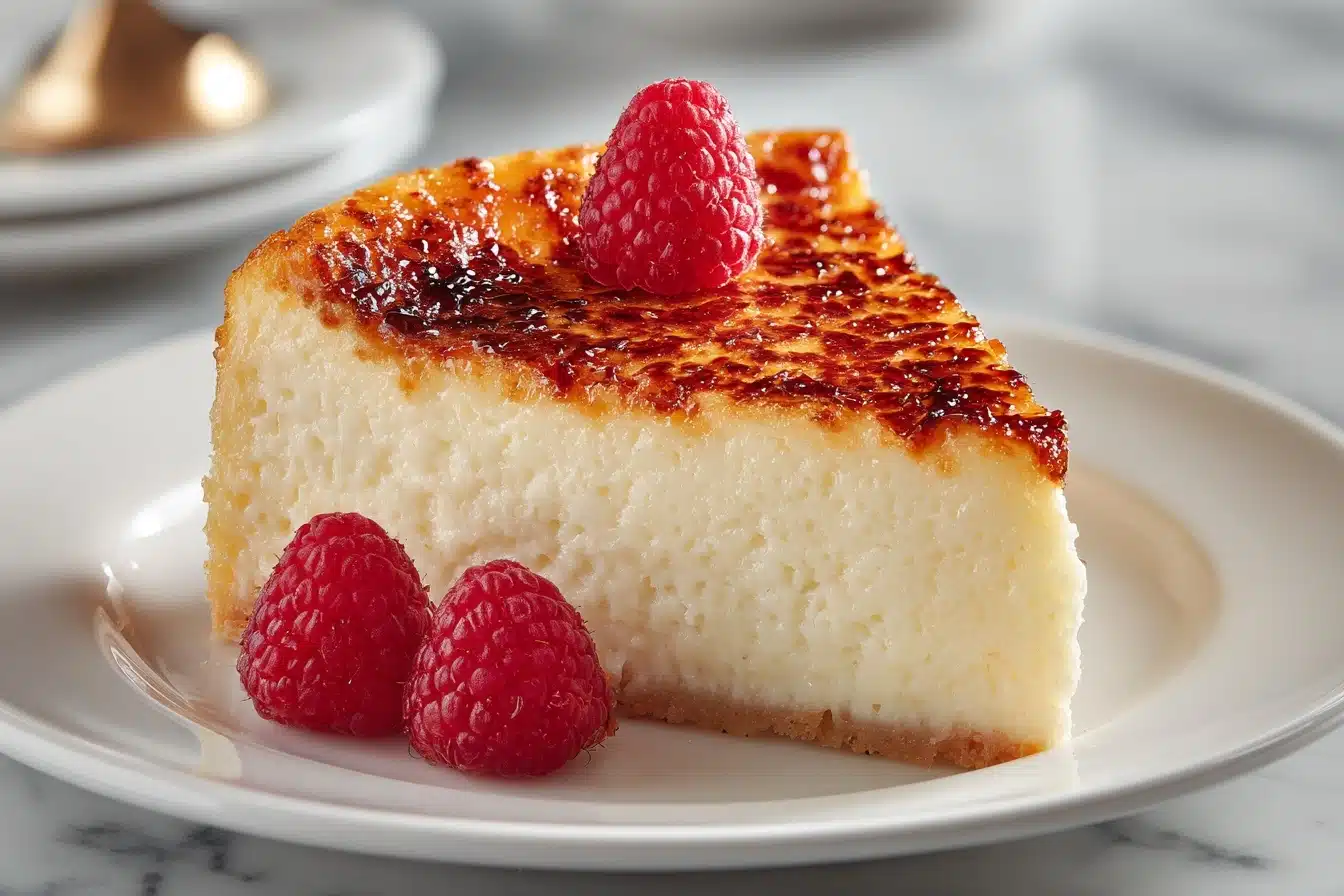
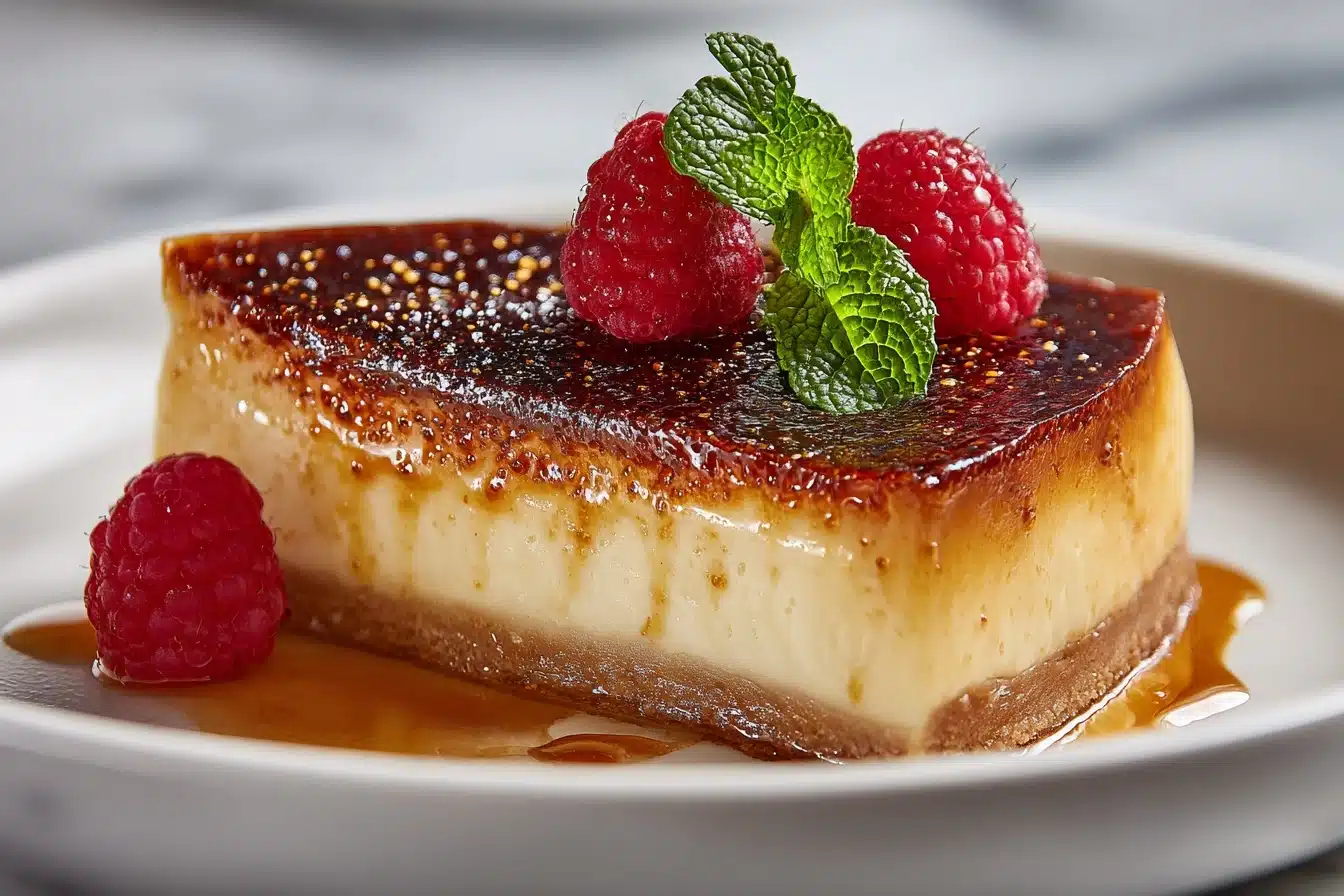
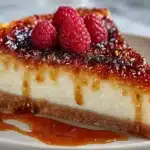
Crème Brûlée Cheesecake is where classic elegance meets pure dessert indulgence. Imagine the silkiness of a traditional New York–style cheesecake paired with the signature crackle of a caramelized sugar topping, all perched on a buttery graham cracker crust. A handful of fresh raspberries on top lifts each bite with a tart, juicy finish. Whether you’re marking a special occasion or just craving something luxuriously sweet, this showstopper dessert is sure to become a fast favorite.
Ingredients You’ll Need
These simple ingredients come together to create magic: each one plays its part to perfect the rich texture, deep flavor, and irresistible color that define this Crème Brûlée Cheesecake. Nothing fancy, but trust me—don’t skip a single item!
- Graham cracker crumbs: These make the base deliciously crunchy and add a hint of toastiness.
- Granulated sugar: Sweetens every layer and forms that crackly brûlée topping you’ll love breaking into.
- Unsalted butter, melted: Holds the crust together and delivers a subtle richness underneath all that creamy filling.
- Cream cheese, softened: The hero that gives the cheesecake its signature velvety texture—be sure it’s at room temperature for best results.
- Vanilla extract: A splash brings warmth and depth to both the filling and the aroma.
- Eggs: Essential for setting the cheesecake into a sliceable, creamy dream.
- Sour cream: Balances richness with a slight tang and helps keep the filling extra smooth.
- Heavy cream: Boosts the silkiness to levels you never knew cheesecake could reach.
- Granulated sugar (for caramelizing): Makes that classic golden brûlée crust—don’t be shy with your blowtorch!
- Fresh raspberries: The perfect pop of bright flavor and color as a final flourish.
How to Make Crème Brûlée Cheesecake
Step 1: Prepare the Pan and Oven
Set your oven to 325 °F (160 °C), butter up a 9-inch springform pan, and line the bottom with parchment. This gives you fuss-free cheesecake removal and means your crust stays perfectly intact for the final presentation.
Step 2: Create the Graham Cracker Crust
In a bowl, blend the graham cracker crumbs, sugar, and melted butter until you see that magical sandy texture where everything sticks together. Press this mixture firmly and evenly into the bottom of your pan, then bake for 10 minutes to set. Let it cool before you move on—this keeps the base crisp and never soggy.
Step 3: Mix the Cheesecake Filling
Using your mixer on low speed, gently beat the cream cheese until smooth, taking the time to eliminate every lump. Add in the sugar and vanilla, and keep mixing until everything is creamy (but don’t overdo it—the less air, the silkier the result). Beat in the eggs, one by one, scraping the bowl as needed for a luxuriously even texture.
Step 4: Add the Creams for Silky Perfection
Stir in the sour cream and heavy cream until smooth and glossy. This duo is what gives Crème Brûlée Cheesecake its legendary creamy bite. Resist the urge to rush—gentle mixing is key.
Step 5: Bake the Cheesecake
Pour the filling over your cooled crust. Smooth the top with a spatula and bake for 45–50 minutes, or until the center jiggles slightly when nudged. Turn off the oven, crack open the door, and let your cheesecake rest inside for 15 minutes to prevent any sudden temperature shocks.
Step 6: Cool and Chill Thoroughly
Remove the cheesecake and allow it to reach room temperature before transferring to the fridge. Refrigerate for at least 4 hours (let’s be honest, overnight is even better). This rest time sets the filling, making every slice clean, rich, and impossibly smooth.
Step 7: Brûlée the Sugar Topping
Just before serving, scatter a thick, even layer of granulated sugar over the cheesecake’s surface. Grab your kitchen torch and carefully caramelize until you have a shatteringly crisp, golden crust. The caramel top is the crowning glory of every Crème Brûlée Cheesecake, so get it as evenly torched as possible for maximum dramatic effect.
Step 8: Garnish and Serve
Let the caramel cool just enough to crack beautifully under a spoon. Top the cheesecake with a generous handful of fresh raspberries for a burst of color and a tangy counterpoint to the creamy sweetness. Cut into slices, listen for that signature crunch, and serve!
How to Serve Crème Brûlée Cheesecake
Garnishes
A scattering of fresh raspberries really wakes up the flavor of this cheesecake and looks gorgeous against the glassy caramelized sugar. For extra flair, consider a dusting of powdered sugar, a sprig of mint, or even shards of caramel for a touch of drama on each plate.
Side Dishes
Since Crème Brûlée Cheesecake is rich and satisfying, keep the sides light. Fresh berries, a lemony fruit salad, or even a tart-sweet coulis brighten the palate between bites. A hot espresso or a crisp glass of sparkling wine pairs beautifully, making each forkful feel like a special occasion.
Creative Ways to Present
For a playful twist, serve individual mini cheesecakes in jars or ramekins, torching the sugar topping tableside for extra wow factor. Or slice the cake into slender bars for an elegant afternoon tea. You can even layer the filling and crust parfait-style for a modern take—just don’t forget the all-important brûlée top!
Make Ahead and Storage
Storing Leftovers
Leftover Crème Brûlée Cheesecake keeps beautifully in the fridge for up to five days. Store slices in an airtight container, and if you’ve already brûléed the top, place a piece of parchment between layers to help protect that delicate sugar crust from softening.
Freezing
You can absolutely freeze this cheesecake (just hold off on the caramelized sugar until serving). Wrap the whole cake or individual slices tightly in plastic wrap and foil, then freeze for up to two months. Thaw overnight in the fridge, and brûlée the sugar right before digging in for best results.
Reheating
No need to reheat, since Crème Brûlée Cheesecake is best enjoyed chilled or at room temperature. If you need to refresh the brûlée topping after storing, you can add a little more sugar and re-torch just before serving for that shatteringly crisp finish.
FAQs
Can I make Crème Brûlée Cheesecake without a kitchen torch?
Absolutely! If you don’t have a torch, pop the sugared cheesecake under your oven’s broiler on high, keeping a very close eye so it doesn’t burn. Rotating the pan helps brown the sugar evenly. It’s just as delicious, though the crust might be a touch softer.
Why does my cheesecake crack on top?
Cracking usually comes from sudden temperature changes or overbaking. Be sure to let your cheesecake cool gradually in the oven with the door ajar, and avoid overmixing the batter to keep it extra creamy and smooth.
Can I use a different fruit for garnish?
Definitely! Sliced strawberries, blueberries, blackberries, or a medley of seasonal fruits all make gorgeous toppers. Even edible flowers add a whimsical touch if you want something extra special.
Is it possible to make this gluten-free?
Yes, simply substitute gluten-free graham crackers for the crust. Double check that all your other ingredients are gluten-free as well, and enjoy a stunning gluten-free Crème Brûlée Cheesecake without compromise.
How long should I chill the cheesecake before adding the sugar topping?
A minimum of four hours is essential, but overnight is even better. The colder and firmer the cheesecake, the easier it is to sprinkle and brulée the sugar topping for that signature crisp shell.
Final Thoughts
If there’s one dessert that manages to make everyone at the table pause in happy silence, it’s this Crème Brûlée Cheesecake. It’s pure luxury in every slice, and always a crowd-pleaser. I hope you’ll give it a try—you might just discover your new signature bake!
PrintCrème Brûlée Cheesecake Recipe
Indulge in the luxurious delight of a Crème Brûlée Cheesecake, where a velvety cheesecake meets a crackling caramelized sugar crust, all perched upon a buttery graham cracker base and adorned with fresh, tart raspberries for a delightful contrast.
- Prep Time: 20 minutes
- Cook Time: 50 minutes
- Total Time: 5 hours
- Yield: 12 servings 1x
- Category: Dessert
- Method: Baking
- Cuisine: American
- Diet: Vegetarian
Ingredients
For the Crust:
- 1½ cups graham cracker crumbs
- ¼ cup granulated sugar
- 6 tablespoons unsalted butter, melted
For the Cheesecake Filling:
- 16 oz (450 g) cream cheese, softened
- ¾ cup granulated sugar
- 2 teaspoons vanilla extract
- 3 large eggs
- ½ cup sour cream
- ¼ cup heavy cream
For the Crème Brûlée Topping:
- ½ cup granulated sugar (for caramelizing)
- Fresh raspberries, for garnish
Instructions
- Preheat oven: Preheat the oven to 325 °F (160 °C). Grease a 9-inch springform pan and line the bottom with parchment.
- Prepare Crust: Mix graham crumbs, sugar, and melted butter. Press into pan bottom. Bake for 10 minutes, then cool.
- Make Filling: Beat cream cheese until smooth. Add sugar and vanilla. Add eggs one at a time, then mix in sour cream and heavy cream.
- Bake Cheesecake: Pour batter onto crust and bake for 45–50 minutes. Cool, then refrigerate for at least 4 hours.
- Caramelize Topping: Sprinkle sugar over top and torch for caramelized crust. Garnish with raspberries and serve.
Notes
- Ensure cream cheese is softened for a smooth texture.
- Chill the cheesecake thoroughly for best results.
- Use a kitchen torch for the perfect caramelized topping.
Nutrition
- Serving Size: 1 slice
- Calories: 400 kcal
- Sugar: ~25g
- Sodium: ~300mg
- Fat: ~28g
- Saturated Fat: ~16g
- Unsaturated Fat: ~10g
- Trans Fat: 0g
- Carbohydrates: ~34g
- Fiber: 1g
- Protein: 6g
- Cholesterol: ~130mg
Keywords: #cremebrulee #bruleecheesecake #caramelcrust #raspberrytopping #grahamcrust #richdessert #luxurybake #torchfinish #smoothcheesecake #indulgentsweets #showstopper #homemadebaking #gourmetdessert #bakedgoodness #sweettreat #dessertperfection #creamytexture #crispytop #cheesecakelovers #foodstyling